|
This review page is supported in part by the sponsor whose ad is displayed above
|
|||||||||
 |
|||||||||
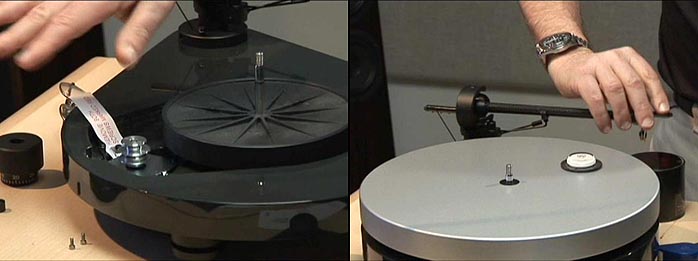
| Setting up the Pro-Ject RM-5 Michael uses the example of setting up a Pro-Ject RM-5 turntable that just arrived in his mail with a Blue Point Special Evo III cartridge to give you a feel for how to get started from analog ground zero. When you buy a new turntable and unpack it from the shipping container, you'll need to follow the manufacturer's directions for initial setup, which with the RM-5 starts with removing the transport screws that protect the motor during shipping. After having done that. Michael recommends that you remove the felt mat so that you can set up the cartridge without having to worry about snagging it on the felt, which could destroy its fragile cantilever. Before you do any more with the table, level it with a bubble level on the plane of play where the stylus would move across the surface. The next step is really important says Michael - using small rubber wedges to secure the platter so it won't move as you continue the setup. |
|||||||||
 |
|||||||||
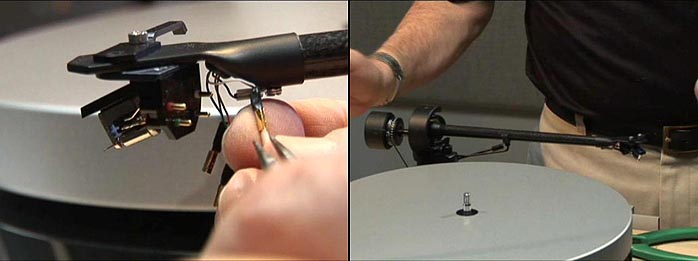
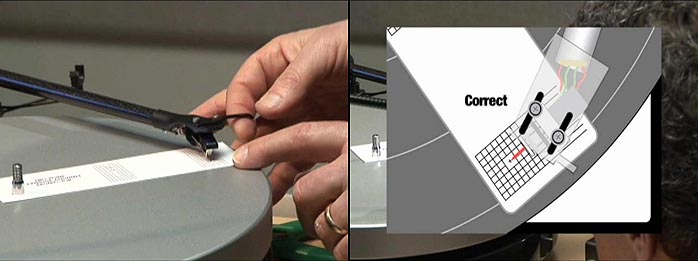
After Michael has completed the initial setup of the table to prepare for cartridge installation, he proceeds to mount the cartridge and attach the tonearm leads to the cartridge pins. Michael includes some nice tips that I think will make this an easier process for the ham-fisted among us. The next step is adjusting the vertical tracking force of the cartridge, which is accomplished via the tonearm's counterweight. Michael likes to first adjust the counterweight so that the arm floats and then he approximately dials in the tracking force per the cartridge manufacturer's recommended value before taking on the next task of setting the horizontal geometry with the supplied template. After the horizontal geometry is dialed, Michael goes back and dials in the correct tracking force before moving on the adjusting the anti-skating. |
|||||||||
 |
|||||||||
 |
|||||||||
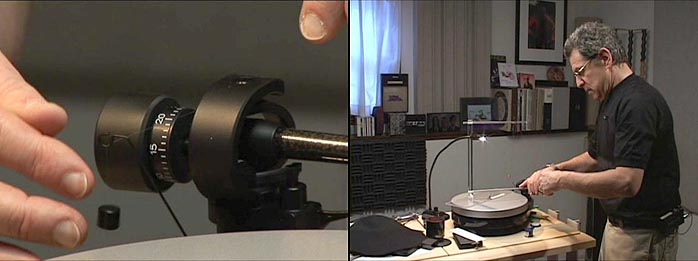
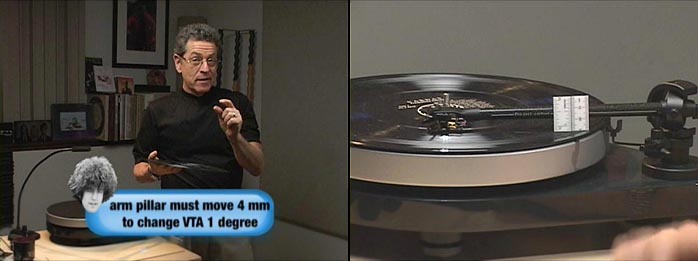
The next step in the setup process is setting the vertical tracking angle and stylus rake angle (VTA/SRA). Michaels says that some people think setting VTA is nonsense because you have to change the arm-post height 4 mm to get a one degree change in VTA - that's a lot. Michael says not to sweat the VTA too much, just make sure it's in the ballpark. From VTA Michael moves to setting the azimuth. Michael demonstrates a couple of methods for doing this such as using a mirror or a voltmeter and includes detailed instructions on the PDF file included with the DVD. That's it! Now you're ready to play a record! |
|||||||||
 |
|||||||||
 |
|||||||||
 |
|||||||||
Wrapping up While I will not describe it here (you'll have to get the DVD for that treat), Michael goes on to set up a Rega P5 and VPI Scoutmaster turntables to provide a couple of more examples from which to learn by observation. The combination of video and PDF files provides a wealth of information on turntable and cartridge setup that no analog lover will want to be without. The PDF file contains a great deal of useful information on turntable setup and record cleaning. I learned a lot about turntable setup from the contents of Michael's DVD and I plan to use my newfound knowledge in setting up turntables here at the moons. I highly recommend Michael's DVD to anyone interested in LP records and turntables. It's obviously a labor of love and easily worth its modest asking price. Many thanks to Michael for going through all the work to put together this fine resource and share his extensive knowledge and experience with the rest of us! |
|||||||||
 |
|||||||||
 |
|||||||||
 |
|||||||||
 |
|||||||||
|
Michael Fremer's website
|
|||||||||
 |
|||||||||